

Updating Software
1. On your computer, navigate to the Indian Motorcycle RIDE COMMAND website. Log in to your account.
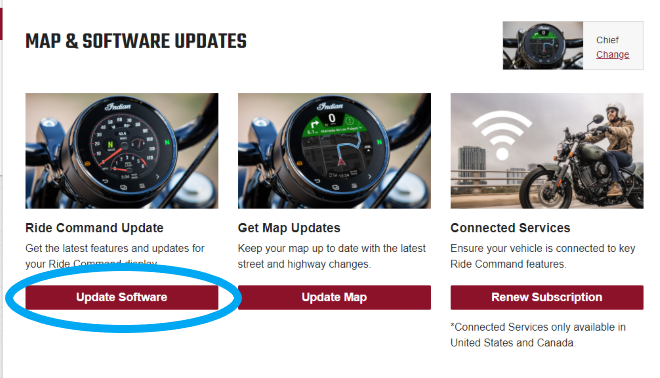
2. Scroll to the bottom of the page and select UPDATE VEHICLE SOFTWARE.

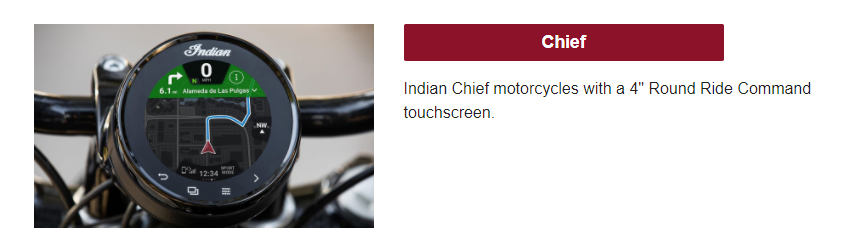
3. Select the CHIEF update next to the photo of the round touchscreen display.
4. Select UPDATE SOFTWARE.
5. Download the most recent update. A wired internet connection is recommended, if available.
6. Save the update file to a 1GB or larger removable USB drive. FAT32 or exFAT® format is supported. The download will not succeed if the drive is not properly formatted or is not large enough for the software package. For step-by-step instructions on formatting the drive, read the Formatting a USB to FAT32 or exFAT® article. Note: Before formatting the drive, copy and save any files on the drive to another location, as they will be deleted when you format the drive.
7. Plug in the USB drive into your vehicle's USB port and power on the vehicle through the right hand control power button. Do not start the engine.
8. Press the App Tray button at the bottom of the screen.
9. Select SETTINGS at the bottom of the screen.
10. Navigate to SETTINGS > GENERAL (gear icon) from the tabs on the top of the screen.
11. Scroll down and select UPDATE SOFTWARE.
12. Select the file you want to install. "Newest" will be automatically displayed next to the newest version detected on the USB drive.
13. Confirm the installation process by tapping on INSTALL button.
14. A status bar will pop up showing the status of the installation process. When installation is complete, the display will restart to complete the process.
It is recommended that you update your maps after updating the software.
Updating Maps
1. Go to the Indian Motorcycle RIDE COMMAND website and log in or create an account.
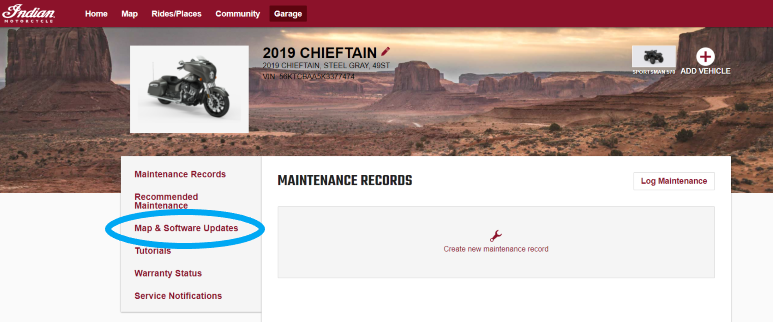
2. Go to the GARAGE tab and enter the Vehicle Identification Number for your motorcycle, if not previously saved.
3. Click on the MAP & SOFTWARE UPDATES link on the left side of the screen.
4. Click on the CHIEF display link.
5. Click UPDATE MAP.
6. Select the map region you wish to download and add to your bike.
7. Enter your email address if it is not already filled out.
8. Click GENERATE MAP PACKAGE.
9. If your bike has maps within two years of purchase and no scratch code is required, skip to step 12. If not, enter your scratch code for redemption.
10. Click UPGRADE MAP.
11. Confirm.
12. You will receive an email with a link to download the map update package. Note: This may take up to 30 minutes to receive.
13. Open your email and click on the DOWNLOAD MAP link to begin the download process. Note: A wired internet connection is preferred if available. The map package is approximately 25GB and may take several hours to download.
14. Save the update file to a 32GB or larger removable USB drive. FAT32 or exFAT® format is supported. The download will not succeed if the drive is not properly formatted or is not large enough for the map package. For step-by-step instructions on formatting the drive, read the Formatting a USB to FAT32 or exFAT® article. Note: Before formatting the drive, copy and save any files on the drive to another location, as they will be deleted when you format the drive.
15. Connect the vehicle to a battery tender to prevent the battery level dropping below necessary starting voltage. The charge port can be located on the left side of the bike near the swingarm pivot.
15. Plug the USB drive into your vehicle's USB port and power on the vehicle through the right hand control power button. Note: Do not start the engine.
16. Press the App Tray button at the bottom of the screen.
17. Select SETTINGS at the bottom of the screen.
18. Navigate to SETTINGS > VEHICLE (motorcycle icon) from the tabs on the top of the screen.
19. Select DISPLAY POWER DOWN.
20. Select DISABLE AUTOMATIC POWER DOWN. Note: This will keep the display awake until power is manually turned off through the power button on the right hand control.
21. Navigate to GENERAL settings tab > VEHICLE (motorcycle icon) > GENERAL (gear icon).
22. Scroll down and select UPDATE MAPS.
23. Select the file you want to install. "Newest" will be automatically displayed next to the newest version detected on the USB drive.
24. Confirm the installation process by tapping on the INSTALL button.
25. A status bar will pop up showing the status of the installation process. When installation is complete, the display will restart to complete the process.
26. Manually power down the vehicle through the use of the POWER button on the right hand control.
More information about RIDE COMMAND can be found in the Owner's Manual for your vehicle.
Visit the RIDE COMMAND website to create an account and update software/maps.
Not sure what you need? Check out the Guide to Indian Motorcycle Displays Powered by RIDE COMMAND.
exFAT® is a registered trademark of Microsoft Corporation
Unless noted, trademarks are the property of Indian Motorcycle International, LLC
© 2022 Indian Motorcycle International LLC


