

Before purchasing a set of Indian Motorcycle grips, make sure to verify that the grips fit your particular model of motorcycle. To do this, use the fitment toolbar at the top of the product page, shown below.

Three sets of accessory grips are available for 2015-2024 Scout models. View the instructions for these kits by searching the Indian Motorcycle Accessory Installation Instruction Site.
Part number 2882520-266 (Handlebar Grips - Black) is a grips set that is open on the ends. This allows you to add Bar End Mirrors to your motorcycle.
Part number 2881964-266 (Oversized Handlebar Grips - Black) is another oversized grip kit.
Part number 2884667 (3-Setting Heated Grips) provide a heated grip for your motorcycle.
Make sure to read the installation instructions that come with your specific grip kit. In addition to instructions, they include part numbers for replacement parts.
Grip installation is easier if the vehicle is clean and free of debris. Before beginning, ensure your Scout is parked on a flat surface, the kickstand is fully extended and the vehicle is stable.
Right-Hand Side
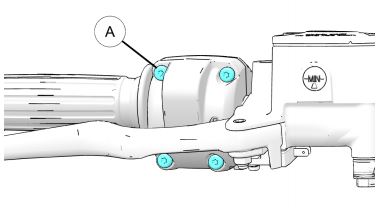
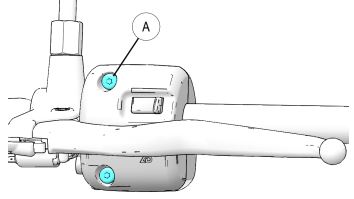
1. Remove the four TORX® bolts (A) from the right-hand switch cube.
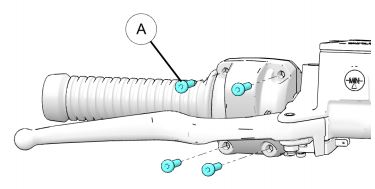
2. Separate the right-hand switch cube halves and slide the right-hand throttle tube/grip (B) off the handlebar.

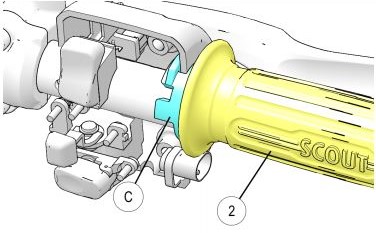
3. Install the new right-hand throttle tube/grip (2) on the handlebar. Ensure to line up the slots in the throttle tube (C) to the throttle housing.
4. Reinstall the four TORX® bolts (A) and tighten them to 36 in-lbs (4 Nm).
5. Cycle the throttle after reassembly to confirm it moves freely and does not bind.
Left-Hand Side
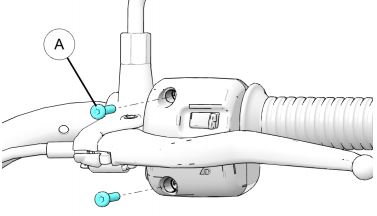
1. Remove the two TORX® bolts (A) from the left-hand switch cube and remove the switch housing. Retain all parts for reinstallation.
2. Remove the left-hand grip (D) by gently inserting a straight blade screwdriver between the grip and handlebar to release the adhesive. Adding a small amount of adhesive solvent will help loosen the adhesive. Be careful not to get solvent on any painted surfaces.
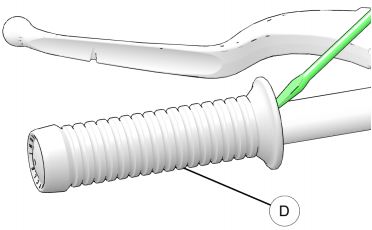
3. Firmly grasp the left-hand grip (D) and remove it from the handlebar. A strap wrench or compressed air can be used to assist in removal.

4. Remove any adhesive residue or grip material from the handlebar.
5. Reinstall the switch cube and tighten the bolts (A) to 36 in-lbs (4 Nm).
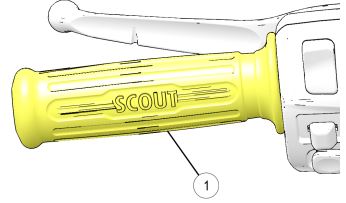
6. Apply the supplied adhesive to the handlebar end, covering as much area as possible to get the adhesive distributed evenly. Quickly force the left-hand grip (1) onto the handlebar until the grip bottoms out against the handlebar end. Quickly rotate the grip to the desired rotation before the adhesive sets. Allow the motorcycle to sit for a period of 24 hours to allow the glue to dry and set properly.
View the full selection of Indian Motorcycle grips.
For more information, see your authorized Indian Motorcycle Dealer. Find a dealer near you with the Dealer Locator.
Maintenance tips, procedures and specifications can be found in your Owner's Manual.
To find diagrams and replacement part numbers, use the online parts catalog.
TORX® is a registered trademark of Acument Intellectual Properties, LLC
Unless noted, trademarks are the property of Indian Motorcycle International, LLC
© 2021 Indian Motorcycle International, LLC


