Route planning can be done online on the RIDE COMMAND website and uploaded to the 2017-2019 or 2020+ 7" Display powered by RIDE COMMAND.
On models with the 4" Display, route planning can only be done on the bike. You can not plan a route on the app or website and sync it to the display. You can enter a destination directly on the display for start-to-end navigation. For more information on route tracking and navigation, watch the display overview video.
Note: The 4.3" Display equipped on some 2019-2022 FTR models does not support route planning and navigation.
ROUTE PLANNING
To plan a route using RIDE COMMAND, begin by visiting the Indian Motorcycle RIDE COMMAND website on your computer. Log in to your account or create an account.
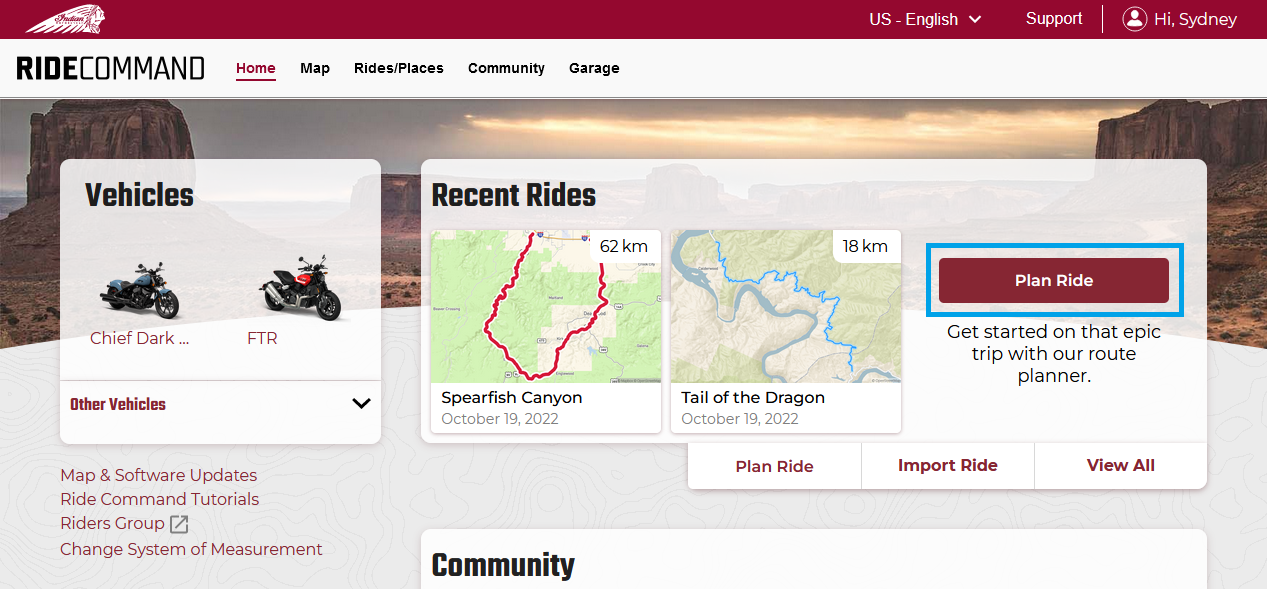
Select PLAN RIDE in the middle of the screen.

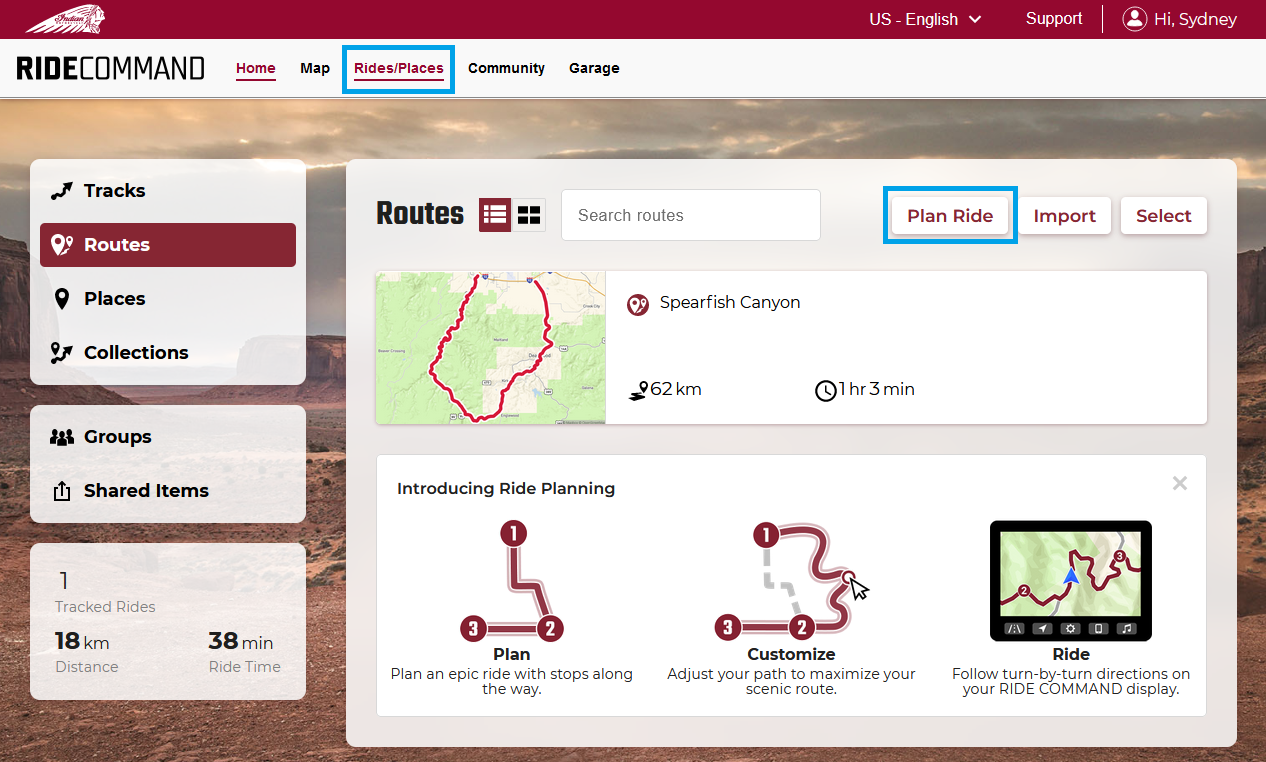
You can also navigate to RIDES/PLACES and select PLAN RIDE in the top right.

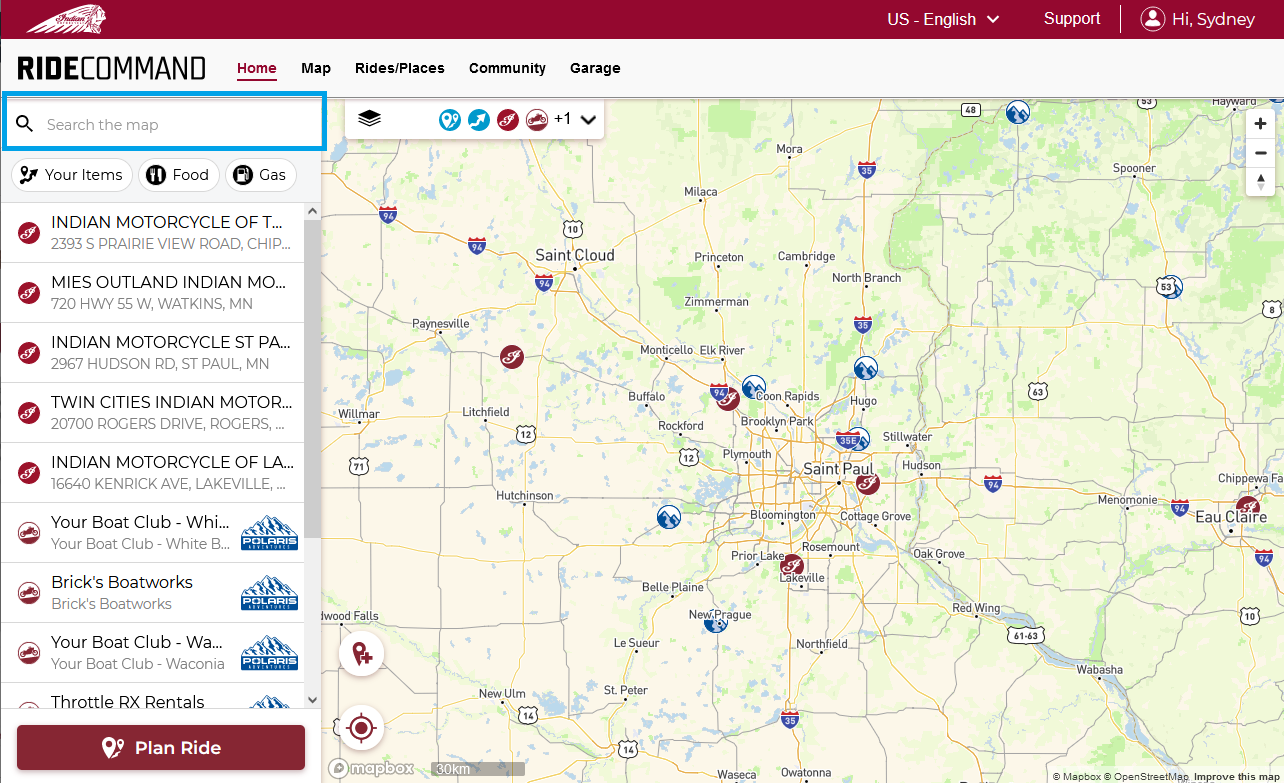
Choose a starting point for your ride by clicking anywhere on the map or by searching in the left side panel, as shown below.

When using the search panel to the left, be sure to click ADD once you have found your desired location. The location will not be automatically added to your route when using the search bar.

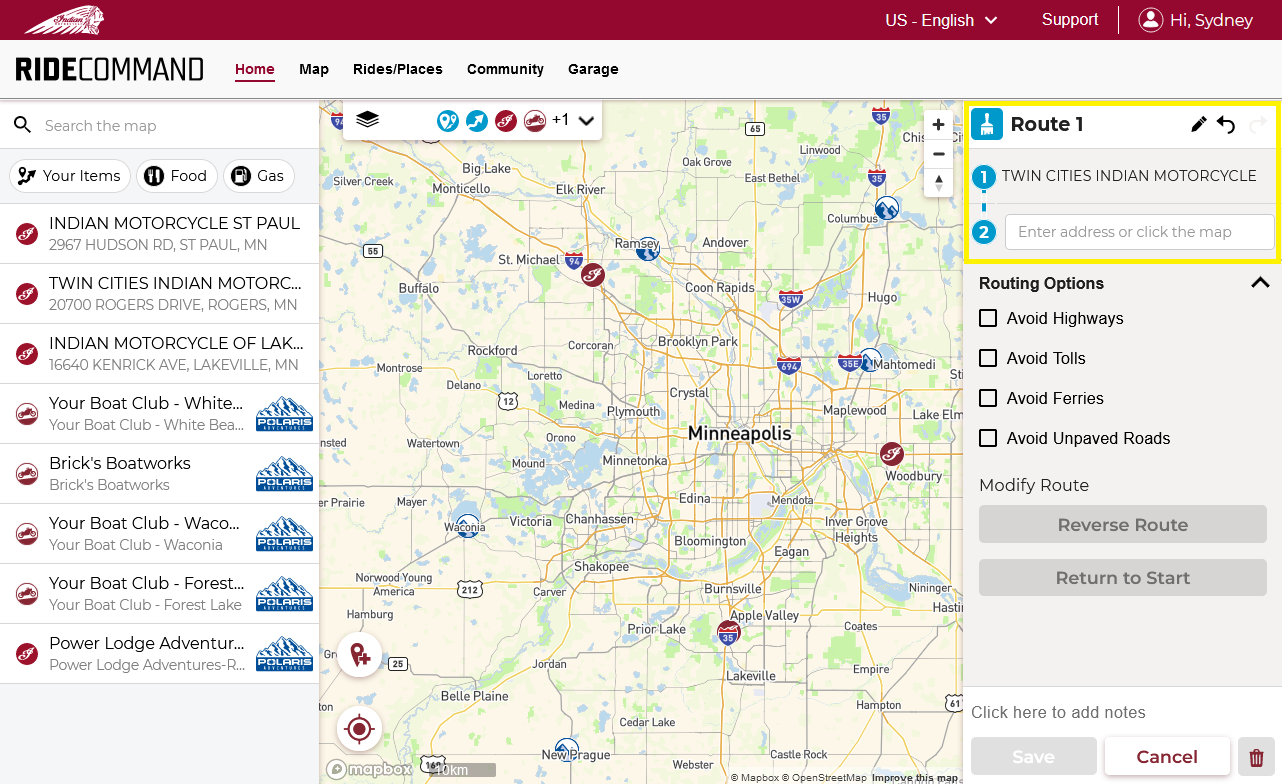
Continue to add your desired locations and destination to your route. You can reorder stops by dragging the entries in your ride. If you wish to delete a stop from your ride, hover over the entry and click the trash can icon to delete. You can also customize your route to avoid highways, tolls, ferries and/or unpaved roads.

Once satisfied with your route, name it and click SAVE. Adding a description to the ride is optional.
UPLOADING ROUTES TO THE BIKE
Depending on which vehicle you have, there are different ways to upload your routes to your vehicle's display.
2020 and Newer Indian Motorcycles
Syncing a ride to your Indian Motorcycle requires Bluetooth® tethering. This will allow the display to access rides and waypoints you have saved to your Indian Motorcycle account.
1. Go to SETTINGS on your phone. For an iPhone®, go to Personal Hotspot Connections, Mobile Hotspot and Tethering. If using an Android®, tap on Bluetooth® tethering and turn it on. Leave the phone on this screen.
2. On the display, go to Settings/General/Bluetooth® Devices and tap ADD DEVICE.
3. Once your phone shows up on the list, tap to pair.
4. Accept the pairing code in your phone. On an iPhone® you will see a blue line at the top of your phone screen indicating that it’s connected to a mobile hotspot. On an Android® it will show in the Bluetooth® tethered list.
5. Once you have confirmed you are tethered, go to SETTINGS > RIDE COMMAND ACCOUNT on the display.
6. If already logged into your Indian Motorcycle account on the display, log out. Log back in to establish a new connection.
7. Tap the MAP button from the button panel after your login is successful.
8. Tap the MORE menu at the bottom of the screen.
9. Tap RIDES AND WAYPOINTS.
10. Select the IMPORT/EXPORT icon in the top-right corner of that screen.
11. On this screen, tap SYNC RIDES USING RIDE COMMAND ACCOUNT.
12. Once this screen has loaded, tap the SYNC icon on the right-hand side of the split screen. If you get a notification that you were unable to connect to the server, wait a minute and tap the SYNC icon again.
2019 and Older Indian Motorcycles
On your Indian Motorcycle:
1. Log in to your Indian Motorcycle account on your motorcycle's display.
To log in, follow these steps:
- Tap the Indian Motorcycle logo at the top middle of the display screen.
- Tap on ALL SETTINGS.
- Tap the GENERAL tab on the left-hand side.
- Tap the RIDE COMMAND ACCOUNT tab at the top of the General settings screen.
- Tap on ACCOUNT ID.
- Type in the email address associated with your RIDE COMMAND account and save.
- Type in your password and save.
Note that it may take several minutes to sync places and routes to/from the RIDE COMMAND Cloud.
2. Navigate to the Import/Export menu on the display. To do so, follow the pathway MAPS > MORE > IMPORT/EXPORT.
3. Copy the route from your Indian Motorcycle App to the display powered by RIDE COMMAND by using one of the following two methods:
- Checkmark places and routes you wish to import. Tap on COPY TO/FROM RIDE COMMAND. On the pop-up screen select either SEND to export the data or CANCEL to return.
- Tap on COPY TO/FROM RIDE COMMAND and then tap on the right arrow near the places and routes to export.
Copying Routes and Places with a USB
1. Upload your routes from the RIDE COMMAND website to a USB 2.0 or 3.0 with an exFAT® or FAT32 format. For step-by-step instructions on formatting the drive, read the Formatting a USB to FAT32 or exFAT® article.
2. Plug the USB into the USB port.
3. Go to MAPS > MORE MENU > IMPORT/EXPORT. Copy To USB.
4. Checkmark the places and routes and then tap on COPY TO/FROM USB. On the pop-up screen select either SEND to export or CANCEL to return.
5. To export routes and places, tap on COPY TO/FROM USB and then tap on the right arrow near the places and routes.
6. To import routes and places, tap on COPY TO/FROM USB and then tap on the left arrow near the places and routes. Places and routes that were synced to the display from the USB are found in SAVED PLACES on the Ride Command Map screen.
Importing/Exporting Routes via USB
You can export routes to the RIDE COMMAND Cloud by exporting the routes to a USB flash drive and importing them to the Indian Motorcycle RIDE COMMAND website. Places and routes that are synced to the display powered by RIDE COMMAND from the RIDE COMMAND Cloud can be found in Saved Places on the Map screen.
Copy from RIDE COMMAND
To copy a route from your Indian Motorcycle account to the bike, tap on COPY TO/FROM RIDE COMMAND, wait until places and routes from RIDE COMMAND are synced and then tap on the left arrow near the places and routes to import.
Vehicles with RIDE COMMAND+
On vehicles with RIDE COMMAND+, formerly known as Connected Services, the routes you create on the RIDE COMMAND website will automatically populate to your vehicle's display. Read RIDE COMMAND+ for Indian Motorcycles for more information.
To learn how to sync RIDE COMMAND data between the website, app and display, read Syncing Data with the 7" Display Powered by RIDE COMMAND.
The RIDE COMMAND app is available on the App Store® for iPhone® and iPad®, as well as on Google Play®.
More information about RIDE COMMAND can be found in the Owner's Manual for your vehicle.
Visit the RIDE COMMAND website to create an account and update software/maps.
Not sure what you need? Check out the Guide to Indian Motorcycle Displays Powered by RIDE COMMAND.
Android® and Google Play® are registered trademarks of Google LLC
Bluetooth® is a registered trademark of Bluetooth Sig, Inc.
iPhone®, iPad® and App Store® are registered trademarks of Apple Inc.
exFAT® is a registered trademark of Microsoft Corporation.
Mapboxsm is a service trademark of Mapbox, Inc.
OpenStreetMapsm is a service trademark of OpenStreetMap Foundation
Unless noted, trademarks are the property of Indian Motorcycle International, LLC
© 2022 Indian Motorcycle International, LLC


