

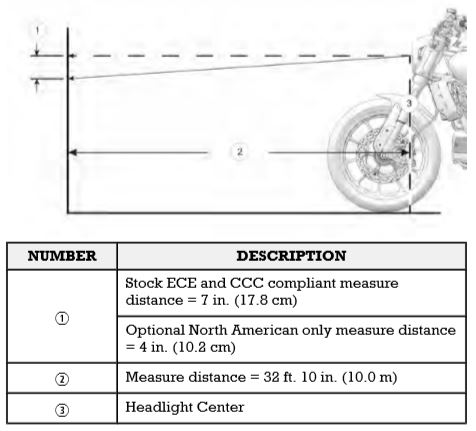
Headlight Aim Inspection
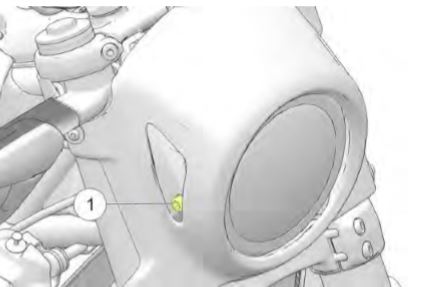
On low beam, the top of the horizontal cut-off of the light beam (1) should be 7 in (17.8 cm) lower than the center of the headlight bulb and centered straight ahead at 32 feet, 10 inches (10 m).
1. Verify that tire pressure is at specification.
2. Verify that the rear suspension ride height (preload) is at specification.
3. Position the motorcycle on a level surface with the headlight 32 feet, 10 inches (10 m) from a wall.
4. With the operator and passenger (if applicable) on board, bring the motorcycle to the fully upright position.
5. Start the engine and switch the headlight to low beam. Observe the headlight aim on the wall.
6. Make any necessary adjustments to headlight aim.
Headlight Aim Adjustment
To adjust the headlamp vertically, loosen the two housing mount fasteners (1), one on each side, and pivot the housing upward or downward. Torque the fasteners to 25 ft-lbs (34 Nm).
Headlight Cowl Removal
To remove the headlight cowl from motorcycles equipped with one:
1. Remove and retain four screws (1) and four washers (2) from the headlight cowl.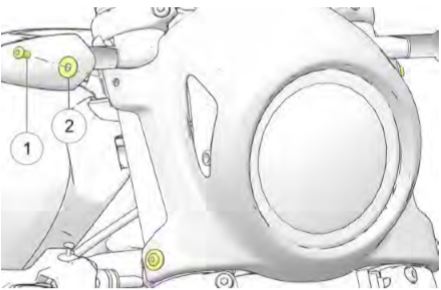
2. Remove the headlight cowl and set it aside for reinstallation.
Headlight Removal
FTR models come with LED headlights. They must be replaced as an assembly.
1. Remove and retain the two screws (1) from the top of the headlight bracket.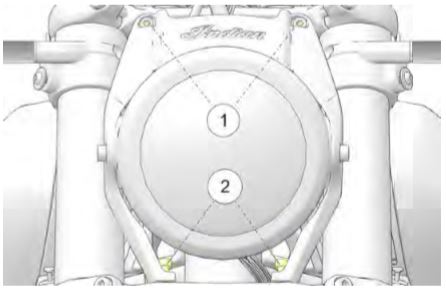
2. Remove and retain the two screws (2) from the bottom of the headlight bracket. Turn the handlebars lock to lock to access two screws from the rear side.
3. With the headlight assembly unmounted, tilt the assembly forward and slide the electronic throttle control (ETC) connection off the push pin clip. It is not necessary to disconnect the harness.
4. Disconnect the headlight from the chassis harness. The headlight connector will remain installed onto the push pin clip.
5. Carefully set the headlight assembly aside on a soft surface so as to not scratch the finished surfaces.
For more information, see your authorized Indian Motorcycle Dealer. Find a dealer near you through the Dealer Locator.
Maintenance tips, procedures and specifications can be found in your Owner's Manual.
To find diagrams and replacement part numbers, use the online parts catalog.
Unless noted, trademarks are the property of Indian Motorcycle International, LLC
© 2022 Indian Motorcycle International, LLC


