

This article will explain how to change the time and time settings on your motorcycle's clock.
Cruiser, Bagger and Touring Models
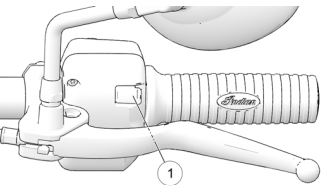
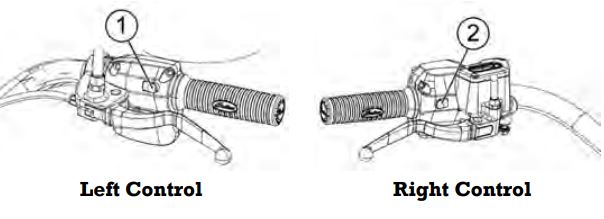
On models equipped with Multi-Function Display modes, use the MODE switches (1) to change clock settings. The MODE switches are located on the left-hand controls, as shown below. The power switch must be ON to access the Multi-Function Display. Use the MODE switches to toggle through the modes.
The clock must be reset any time the battery has been disconnected or discharged.
To set the clock:
1. Use the LEFT-TOGGLE switch to toggle to the odometer display.
2. Press and hold the LEFT-TOGGLE switch until the hour segment flashes. Release the switch.
3. With the segment flashing, tap the LEFT-TOGGLE switch to advance to the desired setting.
4. Press and hold the LEFT-TOGGLE switch until the next segment flashes. Release the switch.
5. Repeat steps 3-4 twice to set the 10-minute and 1-minute segments. After completing the 1-minute segment, step 4 will save the new settings and exit the clock mode.
2015-2024 Scout Models
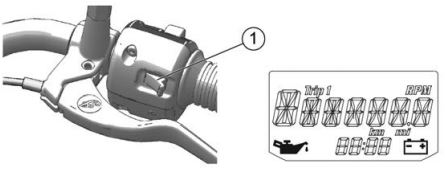
With the ignition switch on, use the MODE button (1) to toggle through the modes of the Multi-Function Display and change the clock settings. The MODE button can be found on the left-hand controls, as shown below.
The clock must be reset any time the battery has been disconnected or discharged.
To set the clock:
1. Use the MODE button to toggle to the odometer display.
2. Press and hold the MODE button until the hour segment flashes. Release the switch.
3. With the segment flashing, tap the MODE button to advance to the desired setting.
4. Press and hold the MODE button until the next segment flashes. Release the switch.
5. Repeat steps 3-4 twice to set the 10-minute and 1-minute segments. After completing the 1-minute segment, step 4 will save the new settings and exit the clock mode.
2025 Indian Scout Models
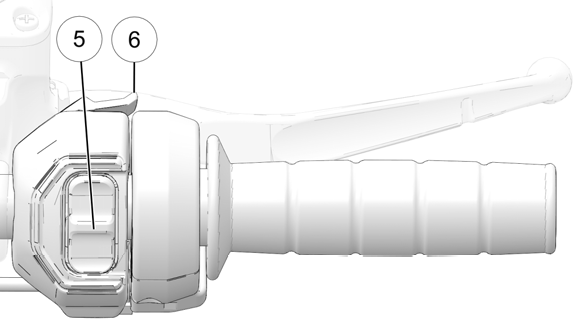
With the ignition switch on, use the right-hand trigger switch (6) to toggle through the modes of the Multi-Function Display and change the clock settings.
The clock must be reset any time the battery has been disconnected or discharged. To set the clock:
1. Use the right-hand trigger switch (6) to toggle to the odometer display.
2. Press and hold the right-hand trigger switch (6) until the hour segment flashes. Release the switch.
3. With the segment flashing, tap the right-hand trigger switch (6) to advance to the desired setting.
4. Press and hold the right-hand trigger switch (6) until the next segment flashes. Release the switch.
5. Repeat steps 3-4 twice to set the 10-minute and 1-minute segments. After completing the 1-minute segment, step 4 will save the new settings and exit the clock mode.
FTR and 2022+ Chief Models
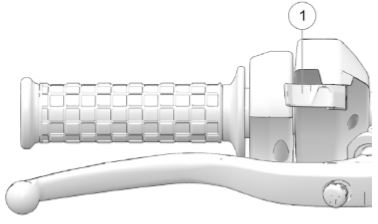
On models without RIDE COMMAND, use the right-hand trigger switch (1), shown below, to cycle through the Multi-Function Display on the analog gauge and set the clock.
The clock must be reset any time the battery has been disconnected or discharged.
To set the clock:
1. Use the RIGHT-TOGGLE switch to toggle to the odometer display.
2. Press and hold the RIGHT-TOGGLE switch until the hour segment flashes. Release the switch.
3. With the segment flashing, tap the RIGHT-TOGGLE switch to advance to the desired setting.
4. Press and hold the RIGHT-TOGGLE switch until the next segment flashes. Release the switch.
5. Repeat steps 3-4 twice to set the 10-minute and 1-minute segments. After completing the 1-minute segment, step 4 will save the new settings and exit the clock mode.
Setting the Clock with RIDE COMMAND
On models equipped with RIDE COMMAND technology, the clock is set by GPS. It can be adjusted through the Time Settings menu. There you can choose between a 12-hour or 24-hour format, enable GPS Time (which automatically sets the time to the time zone you currently are in) or set the time manually if GPS Time is not enabled.
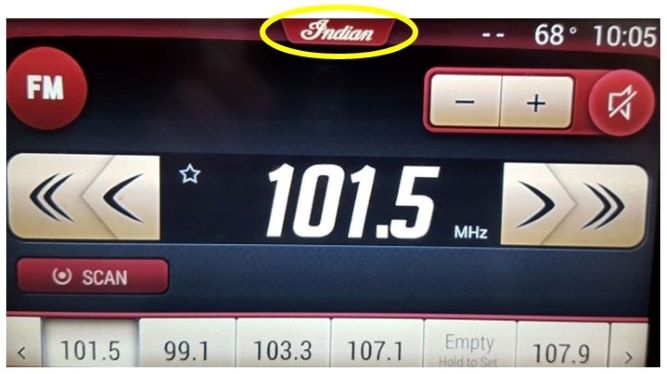
For cruiser, bagger and touring models equipped with the 7" Touchscreen Display, touch the Indian Motorcycle button at the top of the screen to access the settings menu.
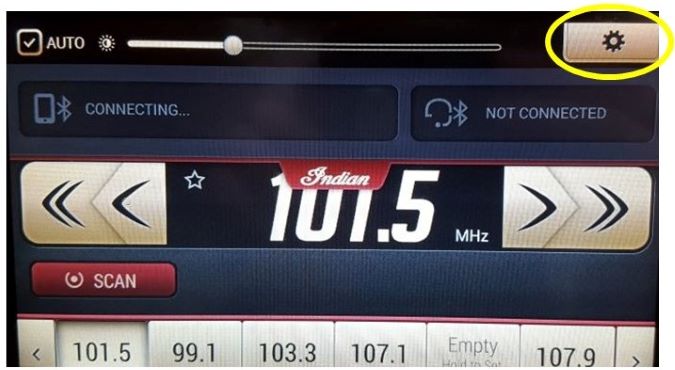
After you’ve accessed the drop-down menu, tap the Settings icon.
Select the Time menu.
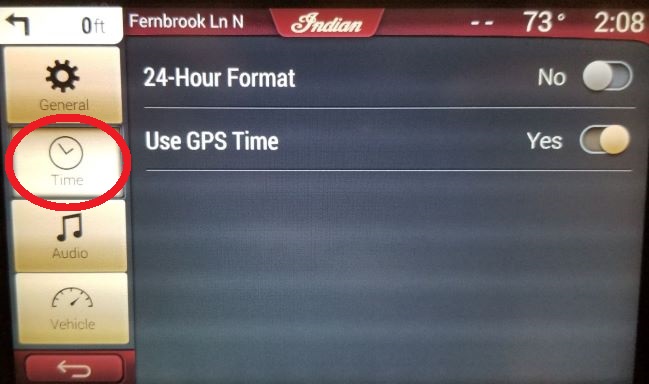
Here you can choose between a 12-hour or 24-hour format, enable GPS Time (which automatically sets the time to the time zone you currently are in) or set the time manually if GPS Time is not enabled.
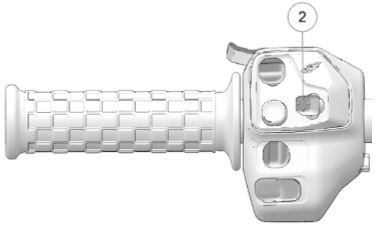
For FTR models with the 4.3" Display, press the center button, shown below, on the console to access the App Tray.
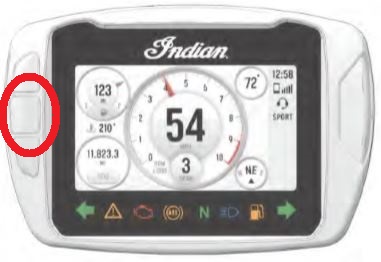
From the App Tray, select the Settings Menu > Time Settings.
You also can navigate the touchscreen display using the hand controls. Use the right-hand trigger switch (1) to toggle through the display screens.
The Five-Way Select Joystick (2) allows you to navigate through the display screen from the left-hand switch cube.
Use the Five-Way Select Joystick to do the following:
- Long press to show App Tray
- Navigate through menu gauge/menu screens
- Enter/select
- Change gauge style
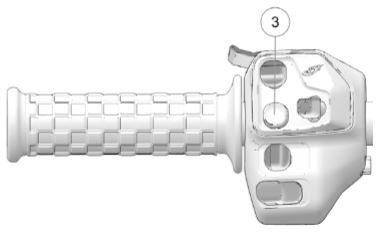
Press the Back Button (3) to do the following:
- Close pop-ups
- Navigate back in menu
- Long press to return to gauges screen
- When viewing a top-level display screen, press the back button to cycle through the Ride Command display screens
Always wait until the motorcycle is parked before setting the clock using the hand controls.
Instrument Cluster
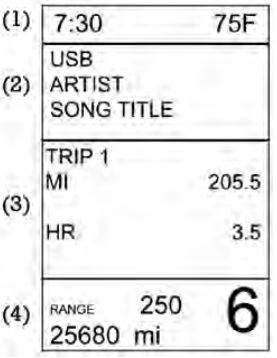
Some bagger and touring models from model years 2014-17 feature an instrument cluster with a separate Infotainment Multi-Function Display (5). This is where the clock can be found.

The clock is in Zone One (1) of the display, shown below.
Use the LEFT-TOGGLE (1) and RIGHT-TOGGLE (2) switches to toggle through the modes of the Multi-Function Display and change display settings.
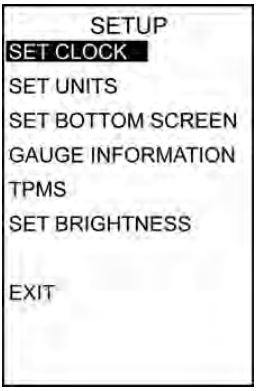
To set the clock, access the instrument cluster setup menus.
1. Place the transmission in neutral.
2. Press and hold LEFT-TOGGLE and RIGHT-TOGGLE.
3. Press RIGHT-TOGGLE repeatedly to cycle through the setup menu.
4. Press LEFT-TOGGLE to select SET CLOCK.
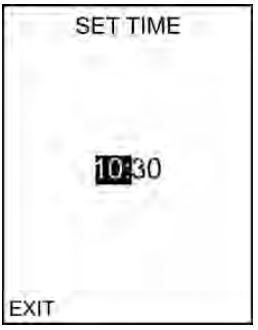
5. Press LEFT-TOGGLE repeatedly to set the hours.
6. Press RIGHT-TOGGLE to move to 10s of minutes.
7. Press LEFT-TOGGLE repeatedly to set the 10s of minutes.
8. Press RIGHT-TOGGLE to move to minutes.
9. Press LEFT-TOGGLE repeatedly to set the minutes.
10. Press RIGHT-TOGGLE to enter the time and move to EXIT.
11. Press LEFT-TOGGLE to exit.
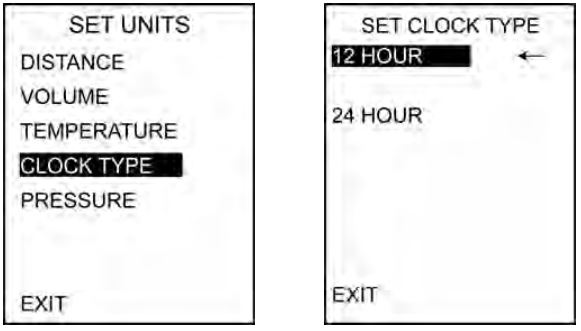
To choose between a 12-hour format or 24-hour format for your clock, select SET UNITS from the setup menu. Then:
1. With CLOCK TYPE highlighted in the SET UNITS menu, press LEFT-TOGGLE.
2. Press RIGHT-TOGGLE to select 12 hour or 24 hour.
3. Press LEFT-TOGGLE to set the desired clock format.
4. Press RIGHT-TOGGLE to select EXIT.
5. Press LEFT-TOGGLE to exit.
For more information about the gauge or instrument cluster on your motorcycle, consult your Owner's Manual.
To find diagrams and replacement part numbers, use the online parts catalog.
To find an Indian Motorcycle Dealer near you, use the Dealer Locator.
Unless noted, trademarks are the property of Indian Motorcycle International, LLC
© 2022 Indian Motorcycle International, LLC


